How to Dry a Toy Poodle Without Creating Tangles
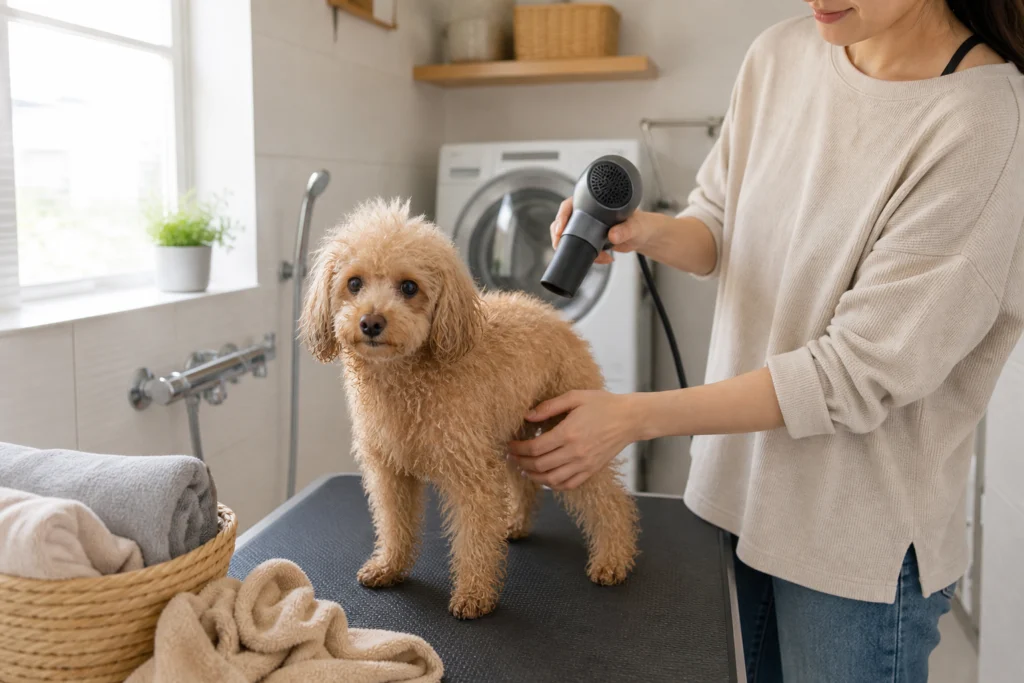
To dry a Toy Poodle without creating tangles, blot away excess water, direct the airflow in one consistent direction and work through the coat in an orderly pattern. Remove most of the moisture before introducing a brush, then dry longer hair in narrow layers. The job is complete when the coat feels dry at skin level and a metal comb passes through the ears, legs, tail and body without catching.
Where drying tangles usually begin
A Toy Poodle’s curly coat holds water beneath its fluffy surface. That alone does not create knots. Trouble usually starts when wet hair is rubbed together, blown in several directions or compressed while the dog rolls, sits or curls up on a towel.
Clip style also matters. A closely trimmed body is relatively simple to dry, while a topknot, full ears, a pompon tail or longer leg furnishings need more control. Pay particular attention wherever long hair meets movement or friction: behind the ears, under the front legs, between the legs, around the feet and beneath a collar or harness.
Set out the right tools first
- Several clean, absorbent towels
- A pet dryer with adjustable airflow
- A small slicker brush suited to a Toy Poodle
- A metal comb with both wider and finer teeth
- A nonslip mat on a secure surface
- An optional coat spray labelled for use during dog grooming
Keep everything within reach before bringing over a wet dog. A Toy Poodle takes up little space, but that small size also makes it easy for the dog to turn, sit or step away while you are reaching for another towel.
Choose settings for the type of dryer
Not every dryer handles the same way, so identify what you are using rather than following one setting for every machine.
High-velocity or force dryer
This type uses a strong stream of air to push water out of the coat. Begin at its lowest practical output, especially with a Toy Poodle, and increase it only if the dog stands comfortably. Starting without a concentrator nozzle can make the initial airflow easier to manage. Follow the dryer’s instructions, and avoid directing the stream toward the face or into an ear opening.
Handheld dryer
A human handheld dryer can produce concentrated heat, so select a cool or lowest-temperature setting and keep it well away from the coat. Move continuously. If you cannot comfortably hold your hand in the airflow at the dog’s position, change the setting or increase the distance.
Stand dryer
A stand dryer leaves both hands available for arranging and brushing the coat. Use gentle airflow and reposition it as you move around the dog; do not leave it aimed at one place. Your Toy Poodle still needs hands-on supervision throughout the session. For a closely related step, see Toy Poodle Nail Trimming: A Step-by-Step Routine.
Whichever dryer you choose, keep the machine, plug and cords away from water. Arrange the hose and cable so neither can loop around the dog or pull across the work area.
Deal with knots before the bath
Run your fingers through the coat before bathing and check the usual friction points. Water and washing can tighten an existing knot, making the drying stage more difficult. A bath should therefore begin with a coat that is already manageable rather than being used as preparation for heavy detangling.
Do not force a brush through a compacted area or try to split a close knot with household scissors. If the coat cannot be separated safely, arrange for a professional groomer to remove the affected hair before continuing with the full bathing routine.
Start by removing water with your hands
After rinsing, let the coat drain for a moment. Cup each leg gently and press downward with your hand. Do the same along the body, chest and tail. For long ears, hold the hair in your palm and squeeze lightly from the upper portion toward the ends. Do not twist it.
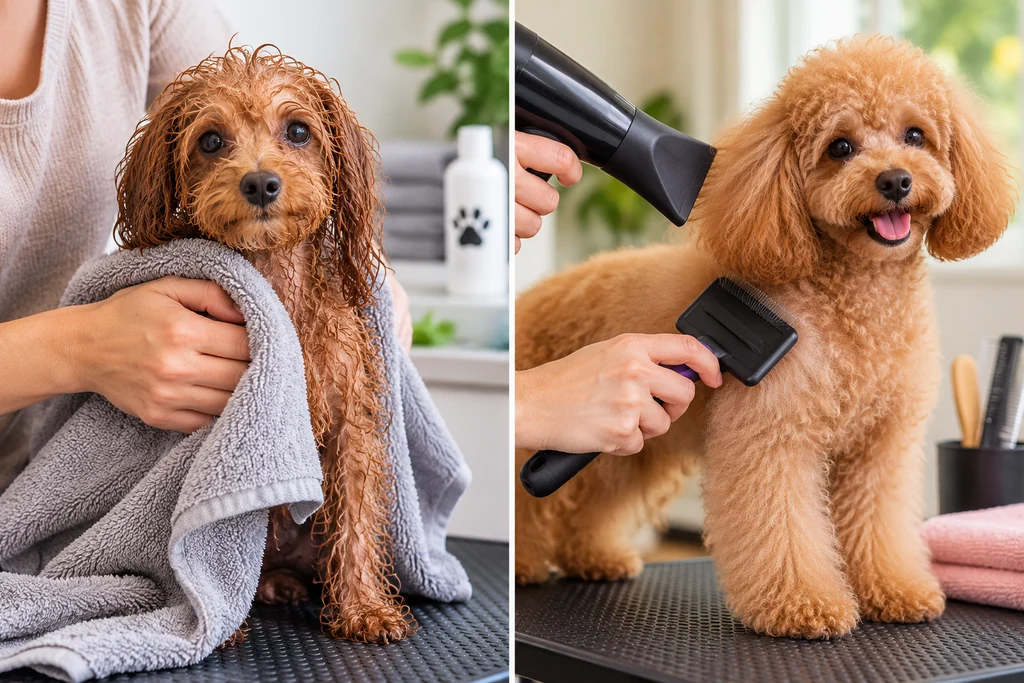
Next, wrap the dog in a dry towel and press with flat hands. Lift and reposition the towel rather than scrubbing back and forth. When the fabric becomes saturated, exchange it for a fresh one. This quick change is more effective than rubbing harder and is much less likely to knot the curls.
Keep your Toy Poodle on the nonslip surface once blotting is finished. A wet dog rolling on carpet or burrowing into a blanket can undo the careful work in seconds.
Remove the bulk of the moisture before brushing
Begin on the torso or hindquarters, where the dog can experience the sound and sensation without air blowing around the head. Hold the dryer far enough away that the coat moves without lashing wildly. Guide the stream along the body in a steady direction.
At this stage, concentrate on pushing out water rather than styling. Follow a simple route around the dog—one side of the body, the other side, chest, underside and legs—so you can see what has been covered. Random passes make it easy to re-wet finished hair with spray from a neighboring area.
Pause to blot drips from the feet, belly or ends of the ears. Once the coat is no longer dripping and the curls feel damp rather than soaked, move on to controlled layer drying.
Dry the coat in layers, not patches
Use your free hand to lift a narrow row of coat. Aim the air where the lifted hair begins, then brush outward with light slicker strokes while following the same row. Move on when that layer is dry underneath. This method is often called line drying because each finished line reveals the next one.
The brush and dryer should work together. If the air is hitting the shoulder while you brush the hip, loose curls between those areas can tumble together. Keeping both tools focused on the same line gives you much better control.
Use only enough brush pressure to separate the hair. The pins should travel through the coat rather than scrape across the skin. You are not required to produce a perfectly straight show finish; for home grooming, an evenly dry, separated coat is the practical goal.
Adapt the method to a Toy Poodle’s clip
A uniform short trim may need little more than blotting, an orderly blow-dry and a final comb check. Longer styles require a more deliberate sequence:
- Topknot: Reduce the airflow before working near the head. Direct the air away from the eyes and nose, lifting the topknot in short rows rather than blowing it in circles.
- Ear furnishings: Support the hair with one hand so the ends cannot whip together. Send air across the outer hair, never into the ear opening.
- Leg furnishings: Work from the upper leg toward the foot, rotating your view rather than pushing all the hair around the leg at once.
- Tail pompon: Hold the tail securely without pulling it. Separate the pompon into manageable layers and dry from its base toward the tips.
- Shaved feet: Lower the air strength if the dog keeps lifting a foot. Dry between the toes carefully without forcing a strong stream into the gaps.
The fine hair immediately behind the ears deserves an extra check because it rubs against both the ear and the neck. The guide to preventing mats behind a Toy Poodle’s ears explains how to maintain this particular friction point between baths.
Use the comb as an inspection tool
When an area appears finished, part the coat and feel underneath. Hair that remains cool, heavy or gathered into damp curls needs more drying. Check under the front legs, inside the back legs, behind the ears, under the tail and wherever a harness normally rests.
Once the hair is fully dry, test it with the wider end of a metal comb. Insert the comb near the base of the coat and draw it toward the tips without forcing it. Follow with the finer teeth where the coat length allows.
If the comb stops, lift it out instead of pulling. Find the snag with your fingers, hold the hair above its base and separate it with a few careful strokes. The comb tells you where more work is needed; it is not meant to drag a knot through the coat.
What to do if a tangle appears mid-dry
Move the airflow away from the snag so the loose ends do not wind around it. Hold the affected hair steady and examine the knot with your fingers. A fresh, loose tangle may open by teasing apart its outer edges and brushing only a few strands at a time.
If repeated brushing makes no progress, stop. Continuing to rake the same spot usually turns a minor interruption into an unpleasant grooming session. Leave difficult coat removal to a groomer rather than forcing a comb or reaching for scissors.
Help your Toy Poodle stay cooperative
A technically good drying method will fall apart if the dog is constantly spinning or trying to leave. Build familiarity in short steps. Let your Toy Poodle investigate the switched-off dryer, run it at a distance for a brief moment, and reward stillness before bringing the airflow closer.
During a full dry, pause between body areas instead of waiting until the dog is restless. Keep one hand on a Toy Poodle standing on a raised surface, and never leave the dog attached to grooming equipment without direct supervision.
Regular coat handling also makes bath day easier. The Toy Poodle puppy brushing guide provides a routine for teaching calm brushing before longer grooming sessions are needed.
Can a Toy Poodle air-dry?
A very short pet clip may air-dry after thorough towel blotting, provided the coat is checked and kept from rubbing against bedding. Longer curls are less predictable: the outside can fluff up while moisture remains underneath, and the dog’s movement can press damp hair into new knots.
If no dryer is available, use several towels, keep the dog from rolling and separate the coat gently as it dries. A self-service wash or grooming appointment is usually more practical for full ears, long legs, a topknot or a longer body coat.
Common mistakes to avoid in trying to dry a toy poodle without creating tangles
- Scrubbing the coat with a towel
- Twisting the ears, tail or leg hair to wring out water
- Beginning with strong airflow beside the face
- Allowing long hair to whip in conflicting directions
- Applying concentrated heat or holding a dryer still
- Brushing saturated curls before removing excess water
- Skipping the armpits, inner legs or hair behind the ears
- Putting a collar or harness over coat that is still damp
- Stopping when the surface looks fluffy without checking underneath
- Using the finishing comb to pull through resistance
The best result is not necessarily the straightest coat. Aim for hair that is dry throughout, comfortably separated and easy to comb. That simple standard prevents far more tangles than aggressive towel work or a rushed blast with the dryer.